Lawn Mower Won’t Start After Winter – How To Troubleshoot
Have you ever encountered a situation like bringing your lawn mower out of the garage on a spring day but it won’t start? If so, you probably want to know if it’s possible to troubleshoot such a lawn mower condition and how?
Start the task by taking the top cover off. Next, remove the air filter, unplug the breather element and remove the air cleaner assembly to get direct access to the carburetor. Clean the plug and bowl thoroughly. Put them back on and tighten the connection securely.
continue reading this article to learn the troubleshooting techniques for a lawn mower won’t start after winter.
What Causes the Problem?
A lawn mower can suffer from starting failure after winterizing due to either a clogged carburetor or stale fuel on the fuel tank.
These are the main reasons behind a lawn mower won’t start after the winter.
Besides that, other common faults like a dead or weak internal battery, loose, dirty, or disconnected Spark plug can cause such trouble.
A dirty Air filter can also lead you to encounter a similar problem with your lawn mower.
7 Steps To Troubleshoot A Lawn Mower That Won’t Start After Winter Storage:
Well, this is one of the most common issues, and if you go through several consumer forums and YouTube videos, you will find several ways of fixing this problem.
However, not all techniques are reliable, and some are even expensive to execute. Or, some ways might enhance the trouble and cause further damage to your mower.
Thus, I have enlisted an easy-to-do yourself method to fix the problem, and the best part is it’s fully free of cost way.
Things you will need to troubleshoot the lawn mower won’t start after winter storage:
Look at the checklist of the required tools and materials for troubleshooting a lawn mower that won’t start after winterizing:
| Tools | Materials |
| 4-In-1 Screwdriver | Carbon Choke Cleaner |
| Pair Of Vice Grips | Fuel Line replacement kit (if required) |
| Half Inch Socket | Air Cleaner/ Starting Fluid |
| Half Inch Wrench | |
| Safety Gloves & Goggles |
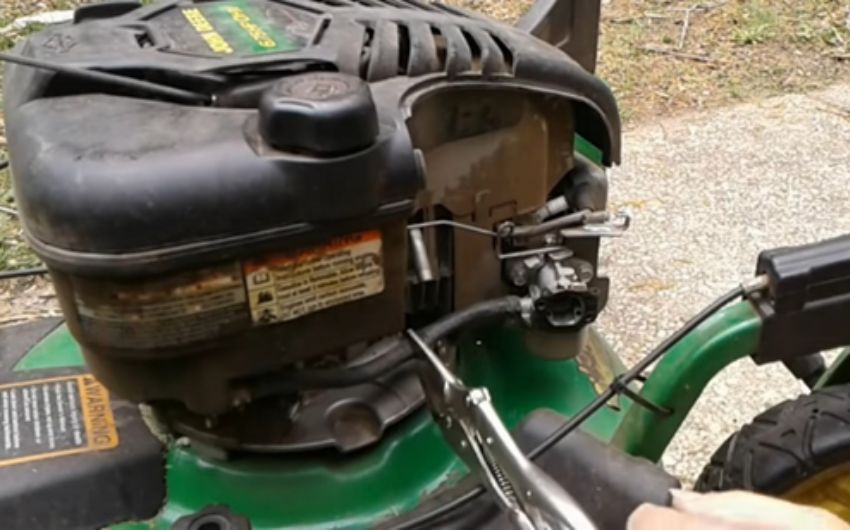
Step 1- Get access to the Carburetor:
Put on the safety gloves and goggles before starting the task.
Start the task by taking off the cover to remove the air cleaner assembly. Use a screwdriver to loosen the mounting bolt and remove the upper cover.
Next, remove the air filter out of the way and unbolt the two screws holding the air cleaner assembly in place.

Then, unplug the breather element to take the assembly off. Now, you will get clear access to the carburetor to investigate further and fix the issue.
Note: Be careful while taking off the air cleaner assembly because there’s a gasket between the cleaner assembly in the carburetor, and you might rip the gasket due to your negligence.
Step 2- Pinch off the Gas line:
Next, you need to pinch off the gas line so that the gas does not continue to run into the carburetor as well as all over the place.
So, use a pair of vice grips to pinch off the fuel line and at the same time, check the fuel line for any sign of wear, cracks, or leaks.
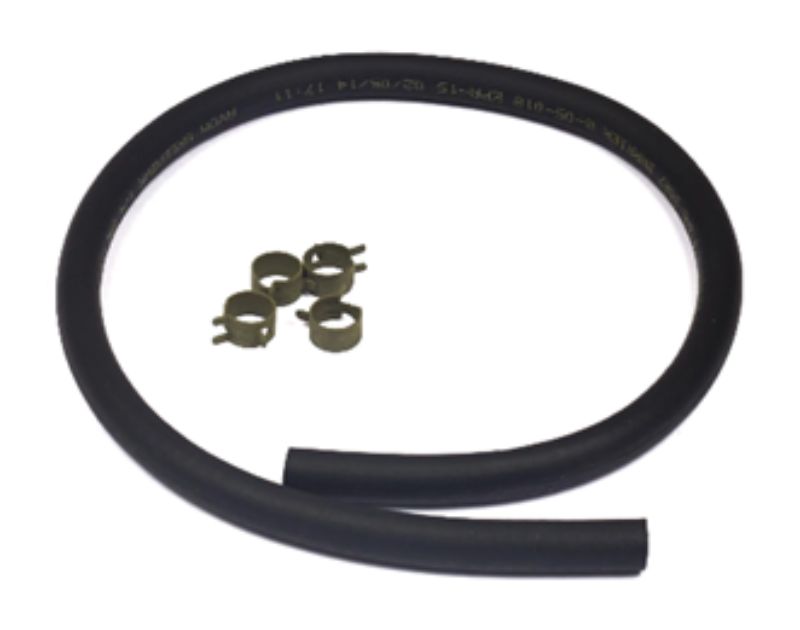
If the fuel line looks worn out, which is not a common scenario after bringing the mower out of the storage, you might need to replace the Fuel Line.
Tips: While picking up the fuel line replacement kit, make sure you are choosing based on your lawn mower brand, type, and model. Otherwise, the replacement kit might not fit into your mower’s internal setup.
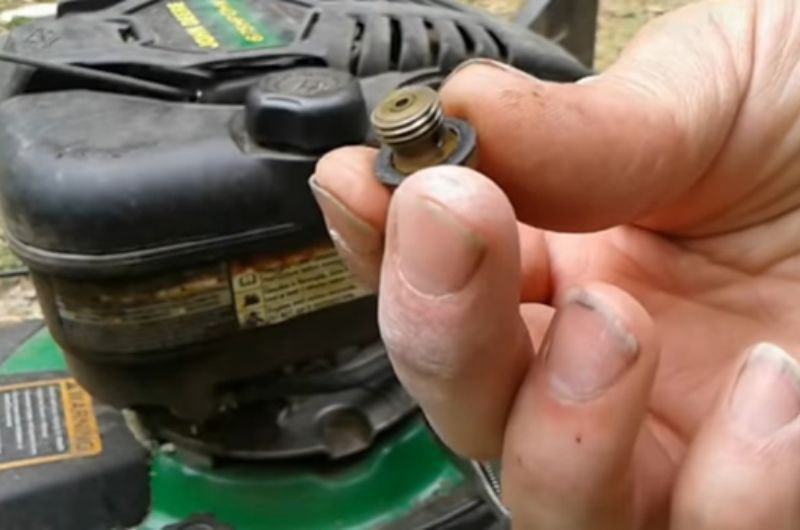
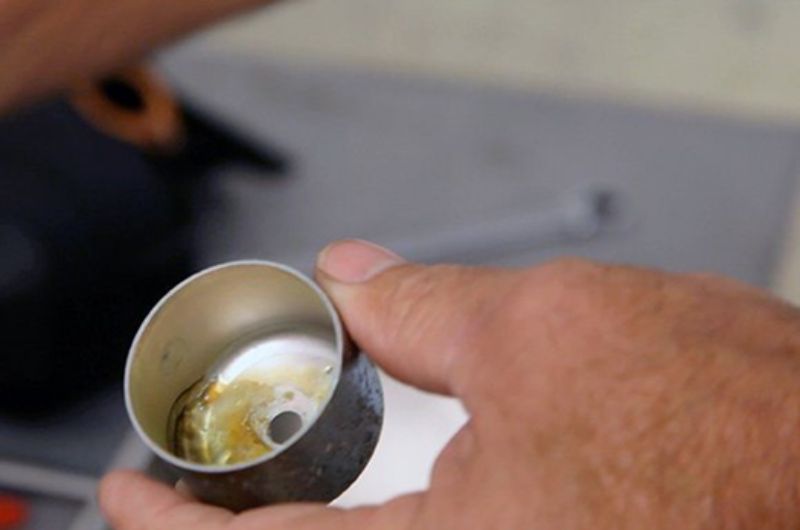
Step 3- Get the Carburetor bottom plug off:
After that, use a half-inch socket to remove the plug of the carburetor bottom. Some gas might spill in this process, so put a cloth underneath the carburetor while working.
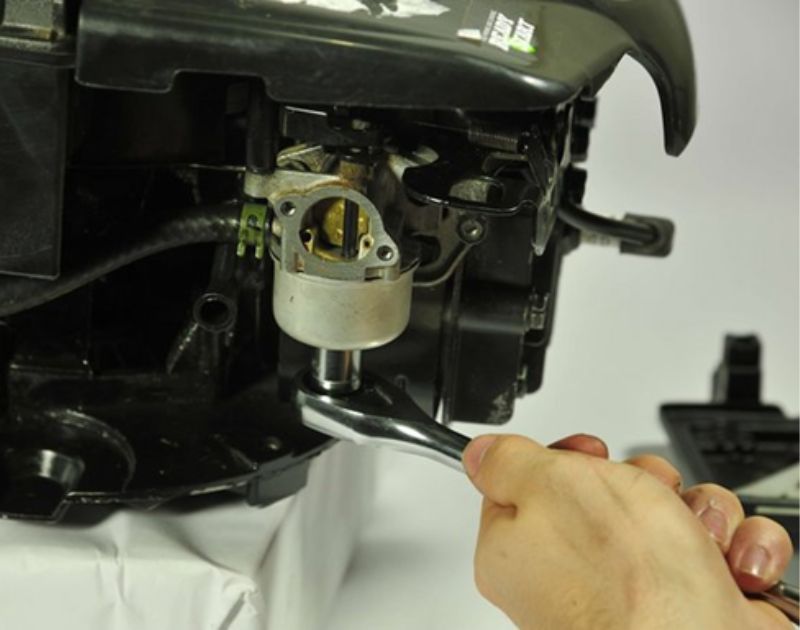
In some machines, you might need a half-inch wrench to take the plug off.
Step 4- Take off the Carburetor:
When you have successfully removed the bottom plug of the carburetor, it’s time to take the carburetor off to inspect the bottom bowl and clean it if necessary.
First, disconnect the fuel line and throttle linkage. Then, remove the mounting bolts that are holding the carburetor in place.
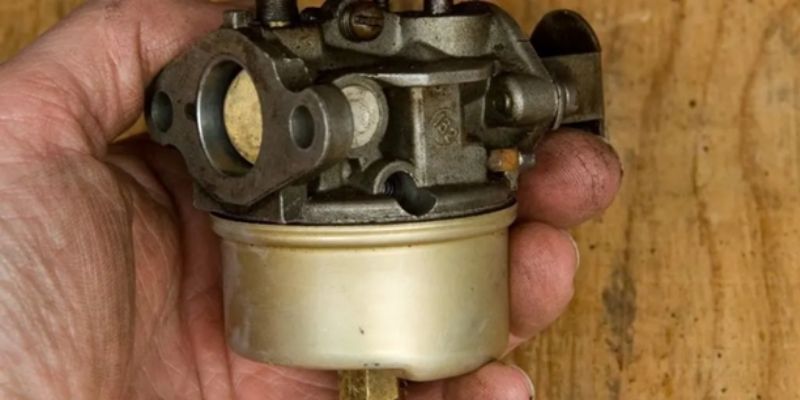
You can also take the bottom carburetor bowl down without removing the whole carburetor.
Use the wrench and carefully loosen the connection.
Then, use your fingers to remove the bowl by rotating it slightly and you will see a little crud in the bowl.
While you clean the bowl, do not forget to clean the bottom plug too. For the step-by-step carburetor cleaning and maintenance guideline, visit this site.
Step 5- Clean the Plug with Highly Specialized tools:
While cleaning the plug you can use a safety pin and a paper clip to clean the holes located in the side and middle of the plug.
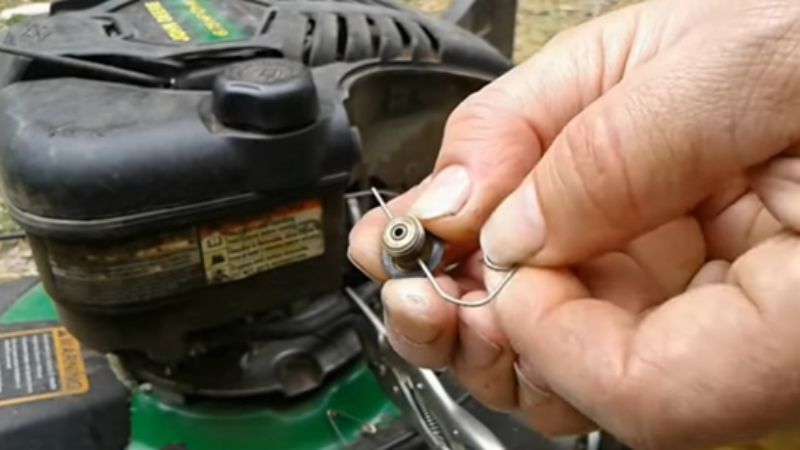
Push the paper clip through the side hole.
Also, for the middle or top hole of the plug use a safety pin.
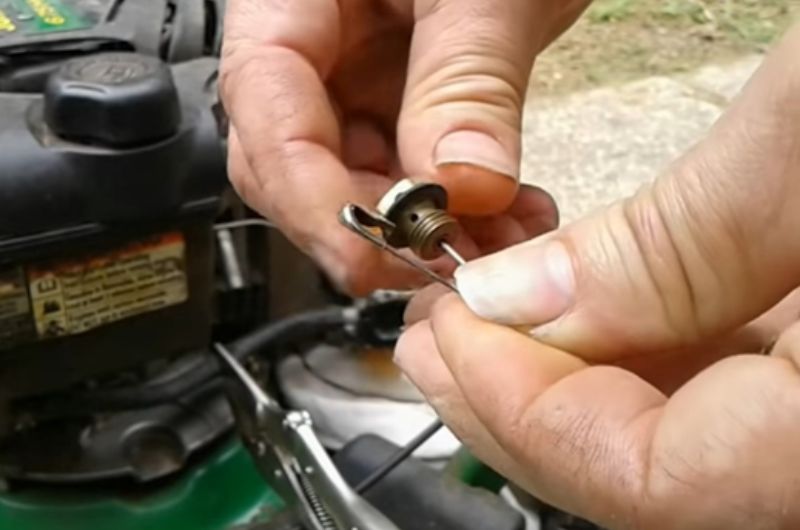
Step 6- Use a Carbon Choke cleaner:
The next thing that you can do is, use a little bit amount of Carbon Choke Cleaner and spray it through the top of the plug.
Make sure that it comes out the sides. After that dry the plug properly.

Next, bring out the carburetor bowl to clean it up by using a rag.
You can use the same cleaner if needed to clean it properly and ensure there’s no crud left after you clean the bowl.
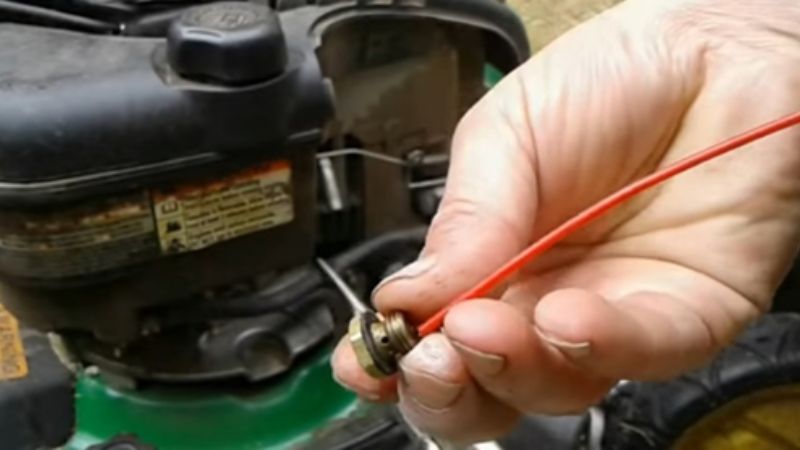
Step 7- Spray Starting Fluid:
Next, put the bowl and bottom plug of the carburetor back in their respective places properly. Tighten the plug accurately and release the vice grip.
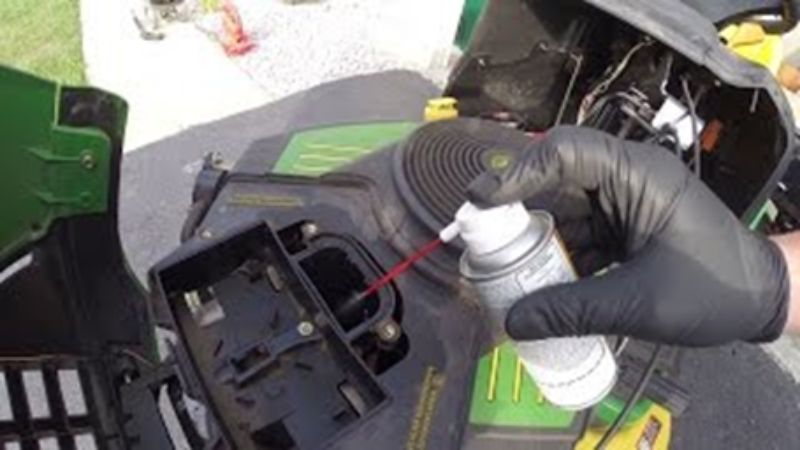
Then, spray the Starting Fluid directly into the carburetor to provide a head start. Now start up your mower to test whether it works or not.
Warning:
Always read your lawn mower’s instructions manual first before operating, servicing, or troubleshooting it. Keep the engine shut off and disconnect all the power sources before starting the thorough inspection.
Frequently Asked Questions: lawn mower won’t start after winter
What will happen if you leave gas in the lawn mower during winter storage?
If you leave the gas on your lawn mower during the winter storage, it will likely degrade and plug up the carburetor. It can also increase the chances of having accelerated rusting within the tank or engine failure.
Can you leave the oil in the lawn mower over winter?
Yes, you can. But make sure you are putting fresh oil, otherwise, when you will get the mower out of the storage after the winter, it might not work, and you might have to deal with troubleshooting issues.
Should you drain the fuel before winterizing your lawn mower?
Yes, you should because left-out fuel can get stale or gum up the carburetor and invite excess rusting trouble while the mower is in winterizing state.
Which is better: storing the lawn mower with or without gas?
For Storing your lawn mower during winter, you should store it without gas because leaving the mower with a filled fuel tank will prevent the moisture from condensing in the tank.
Final Verdict
Now that I have explained all the steps to troubleshoot a lawn mower that won’t start after winter, you can easily get your lawn mower back in the running state within no time.
Besides, you can get a more in-depth idea by reading what experts claim about such troubleshooting issues.
Related Posts: